Jenkins 101: Setting Up Jenkins in Linux


Hey Folks, In this article let us understand how to install Jenkins.
Typically, Jenkins is run as a stand-alone application in its own process with the built-in Java servlet container/application server.
Jenkins is available for all major Operating Systems, but for now, we will install it for Ubuntu, Debian-based Linux distribution.
Prerequisites
Minimum hardware requirements:
256 MB of RAM
1 GB of drive space
If you plan to have Jenkins for a small team running multiple jobs, below are the recommended hardware configuration.
4 GB+ of RAM
50 GB+ of drive space
Software Requirements:
Jenkins requires Java in order to run, some of the OS/Distributions do not include java by default.
- Java: Java Development Kit (JDK) or Java Runtime Environment (JRE).
We would also require a Web browser to access and operate Jenkins
- Web Browser: Google Chrome, Mozilla Firefox, or Microsoft Edge.
Installing Jenkins on Ubuntu (Debian-based distribution)
In Ubuntu, you can install Jenkins through apt.
But first, let's start off by installing Java JDK. There are various Java Implementations you can use, OpenJDK is the most widely used Java Implementation. We will be using OpenJDK 8 now to run our Jenkins.
It is always recommended to update repositories before installing Java
Let's update our apt repositories by running the below command.
$ sudo apt update
Let's Install Java
$ sudo apt install openjdk-8-jdk
This will install OpenJDK 8 on your system.
Verify the installation by checking the version of java by executing the below command
$ java -version
You should see the below message if your installation is successful.
openjdk version "1.8.0_312"
OpenJDK Runtime Environment (build 1.8.0_312-8u312-b07-0ubuntu1~18.04-b07)
OpenJDK 64-Bit Server VM (build 25.312-b07, mixed mode)
Installing Jenkins
Alright, Once the Java is installed let's now begin with installing the Jenkins.
- Add the framework repository key by:
$ sudo wget -q -O - https://pkg.jenkins.io/debian-stable/jenkins.io.key | sudo apt-key add
wget - downloads something from a server.
| - is a pipeline, which takes the output of one command and runs it into the input of another
apt-key - add adds a package key
So it basically downloads the key and then adds it to the list in a single command.
- Linking repository of Debian packages to the source.list file of the server
$ sudo sh -c 'echo deb http://pkg.jenkins.io/debian-stable binary/ > /etc/apt/sources.list.d/jenkins.list'
- Update repository.
$ sudo apt update
- Install Jenkins.
$ sudo apt install jenkins
Starting Jenkins and Configuring Firewall
Start Jenkins.
$ sudo systemctl start jenkins
Check the status of Jenkins by running the below command
$ sudo systemctl status jenkins
The output should look something like this:
● jenkins.service - Jenkins Continuous Integration Server
   Loaded: loaded (/lib/systemd/system/jenkins.service; enabled; vendor preset: enabled)
   Active: active (running) since Fri 2022-05-27 20:12:45 PDT; 1 day 9h ago
 Main PID: 3444 (java)
    Tasks: 38 (limit: 19142)
   CGroup: /system.slice/jenkins.service
           └─3444 /usr/bin/java -Djava.awt.headless=true -jar /usr/share/java/jenkins.war --webroot=/var/
Open Up the Firewall to access Jenkins. By default Jenkins works on 8080 port
$ sudo ufw allow 8080
Check Status.
$ sudo ufw status
The output should look something like this:
Status: active

To                         Action      From
--                         ------      ----
8080                       ALLOW       Anywhere
OpenSSH                    ALLOW       Anywhere
8080 (v6)                  ALLOW       Anywhere (v6)
OpenSSH (v6)               ALLOW       Anywhere (v6)
Setting up the Jenkins
Once the Jenkins installation is completed, now we can access our Jenkins via IP in the browser.
Type your system IP and port 8080.
http://IP:8080
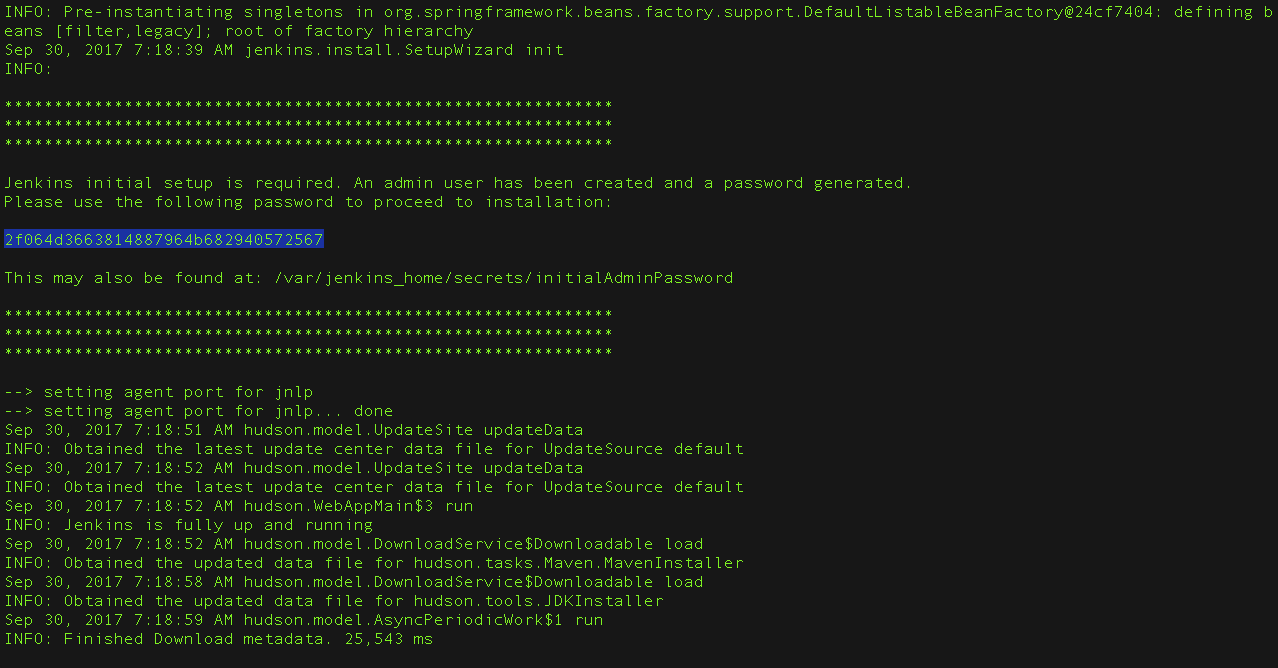
- Unlock page of Jenkins appears, The command:
sudo cat /var/lib/jenkins/secrets/initialAdminPasswordwill print the password at console.
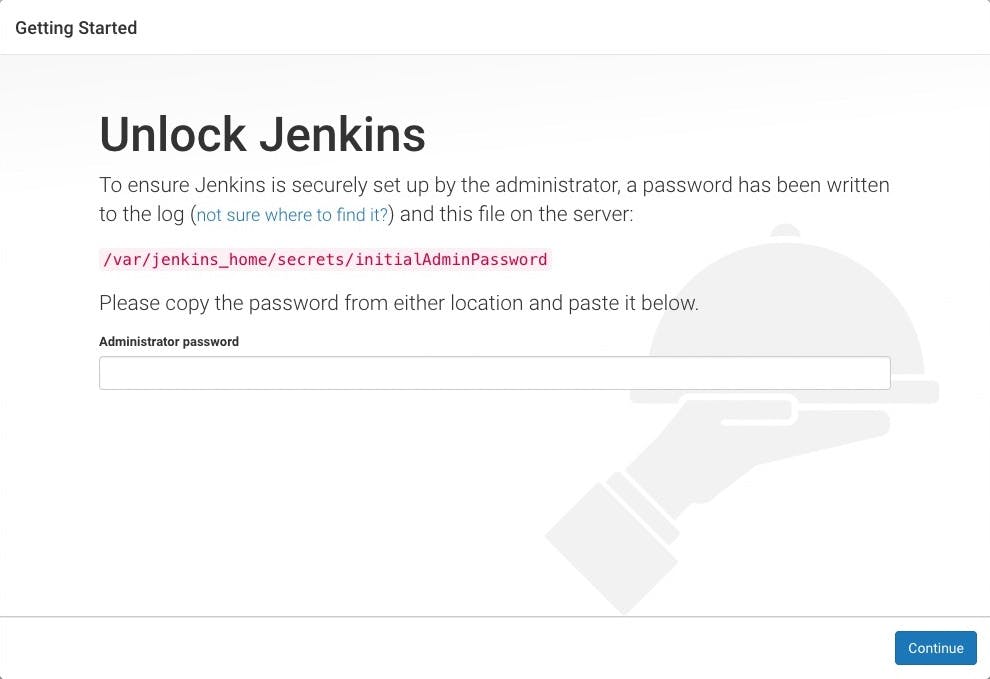
- From the Jenkins console log output, copy the automatically-generated alphanumeric password.
- On the Unlock Jenkins page, paste the password into the Administrator password field and click Continue.
Customising Jenkins with plugins
After unlocking Jenkins, the Customize Jenkins page appears. Here you can install any number of useful plugins as part of your setup.
Choose one of the two options shown:
- Install suggested plugins - to install the recommended set of plugins, which are most commonly used.
- Select plugins to install - choose which plugins you want to install. When you first access the plugin selection page, the suggested plugins are selected by default.
If you are unaware of which plugins need to be installed, just select Install suggested plugins. We can always install the required plugins later.
Creating the first administrator user
After customizing Jenkins with plugins, Jenkins asks you to create your first administrator user.
- When the Create First Admin User page appears, specify the details for your administrator user in the respective fields and click Save and Finish.
- When the Jenkins is ready page appears, click Start using Jenkins.
Log into your Jenkins now with the credentials you just created.
Congratulations!!, you have successfully installed Jenkins on your Ubuntu system.
Check this article on how to create your first Jenkins job.
For any queries or if you get any issues while the installation process, let me know in the comments I would be happy to help you. Happy Learning!